Harpy support for InstanSeg segmentation model#
This notebook provides a minimal example to show how to run instanseg, a pytorch based cell and nucleus segmentation pipeline for fluorescent and brightfield microscopy images. More information here:
Goldsborough, T., O’Callaghan, A., Inglis, F., et al. (2024). A novel channel invariant architecture for the segmentation of cells and nuclei in multiplexed images using InstanSeg. bioRxiv. https://doi.org/10.1101/2024.09.04.611150
Installation:#
uv venv .venv_harpy_instanseg --python=3.11
source .venv_harpy_instanseg/bin/activate
uv pip install spatialdata==0.4.0 # instanseg depends on numpy<2, while spatialdata>0.4.0 requires numpy>=2.
uv pip install "git+https://github.com/saeyslab/harpy.git@main#egg=harpy-analysis[extra]"
uv pip install "git+https://github.com/instanseg/instanseg.git@main"
1. Run instanseg example code#
This is a minimal example to show how to run the code and notebook provided in the instanseg repository.
import torch

from harpy.datasets.registry import get_ome_registry

registry = get_ome_registry(
    path=None
)  # if path is None, example .tif will be downloaded in the default cache folder of your os.
path = registry.fetch("Vectra-QPTIFF/perkinelmer/PKI_fields/LuCa-7color_%5b13860,52919%5d_1x1component_data.tif")

device = "cuda" if torch.cuda.is_available() else "mps" if torch.backends.mps.is_available() else "cpu"
import os

import torch
from instanseg import InstanSeg

# Call the function to download and extract the models

instanseg_brightfield = InstanSeg("brightfield_nuclei", verbosity=1, device="cpu")
instanseg_fluorescence = InstanSeg("fluorescence_nuclei_and_cells", verbosity=1, device="cpu")

# or load the model from a path
path_model = os.path.join(
    os.environ.get("INSTANSEG_BIOIMAGEIO_PATH"), "fluorescence_nuclei_and_cells/0.1.1/instanseg.pt"
)
instanseg_fluorescence = torch.load(path_model, weights_only=False)
instanseg_fluorescence = InstanSeg(model_type=instanseg_fluorescence, device=device)
Model brightfield_nuclei version 0.1.1 already downloaded in /Users/arnedf/VIB/harpy/.venv_harpy_instanseg/lib/python3.11/site-packages/instanseg/utils/../bioimageio_models/, loading
Model fluorescence_nuclei_and_cells version 0.1.1 already downloaded in /Users/arnedf/VIB/harpy/.venv_harpy_instanseg/lib/python3.11/site-packages/instanseg/utils/../bioimageio_models/, loading
Use instanseg to get the pixel size of the image
# we can also use instanseg to get the pixel size
image_array, pixel_size = instanseg_fluorescence.read_image(path)
print(f"Physical pixel size is {pixel_size} μm.")
print(f"image dimensions are (c,y,x): {image_array.shape}.")
Physical pixel size is 0.49799447890790055 μm.
image dimensions are (c,y,x): (1400, 1868, 8).
from instanseg.utils.utils import show_images
image_array, pixel_size = instanseg_fluorescence.read_image(path)
# transpose, so we have (c,y,x)
image_array = image_array.transpose(2, 0, 1)
labeled_output, image_tensor = instanseg_fluorescence.eval_small_image(
image_array,
pixel_size,
resolve_cell_and_nucleus=True,
cleanup_fragments=True,
target="all_outputs",
) # "all_outputs", "nuclei", or "cells".
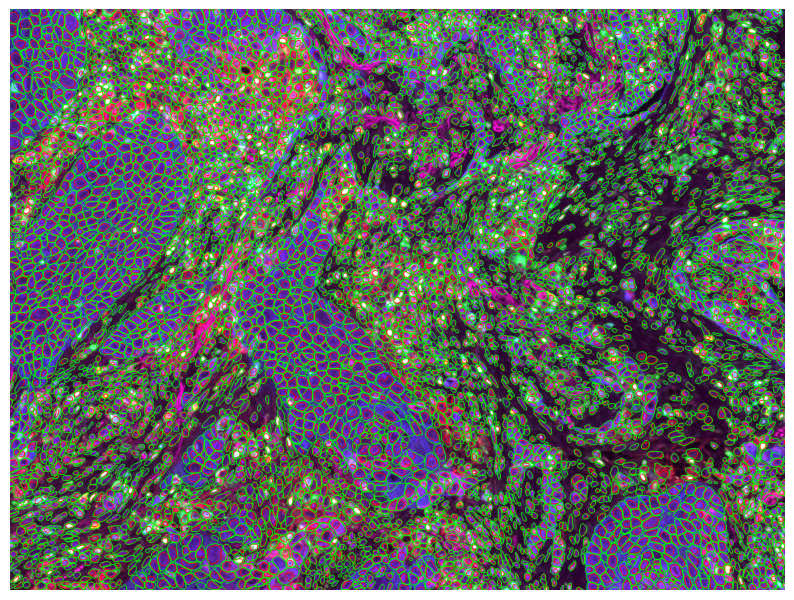
display = instanseg_fluorescence.display(image_tensor, labeled_output)
show_images(display, colorbar=False)
2. Run instanseg with Harpy support#
This is the same example, but using the Harpy library to run the code. The same model is loaded from the Instanseg repository and the code is executed on SpatialData objects.
The same dataset is used, loaded in SpatialData using
harpy.datasets.vectra_example.You can either run the segmentation model directly or via the Harpy segment function
harpy.im.segment.
import harpy as hp

sdata = hp.datasets.vectra_example()
sdata
SpatialData object
└── Images
      └── 'image': DataArray[cyx] (8, 1400, 1868)
with coordinate systems:
    ▸ 'global', with elements:
        image (Images)
from matplotlib.colors import Normalize
import spatialdata_plot # noqa: F401
norm = Normalize(vmin=0, vmax=10, clip=True)
channel = 0
render_images_kwargs = {
"cmap": "grey",
"norm": norm,
}
show_kwargs = {"title": str(channel), "colorbar": False, "dpi": 100, "figsize": (6, 6)}
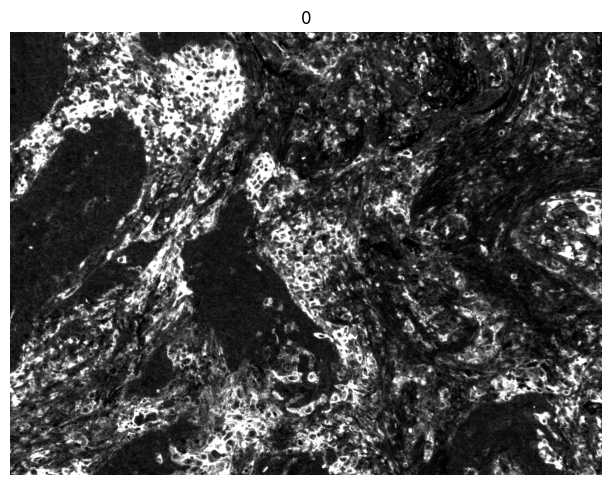
ax = hp.pl.plot_sdata(
sdata,
image_name="image",
render_images_kwargs=render_images_kwargs,
show_kwargs=show_kwargs,
channel=[0],
)
ax.axis("off")
(0.0, 1868.0, 1400.0, 0.0)
2.1 Run just the instanseg model#
The instanseg model is implementated as a Harpy segmentation model (a callable). It can be called like a function using the right arguments and segment the image.
A caveat is that Harpy segmentation models use data formatted as (z, y, x, c) as both input and output. The code above and the data in SpatialData objects is ordered as (c, y, x).
image_array = sdata["image"].to_numpy().transpose(1, 2, 0)[None]
image_array.shape  # -> (z,y,x,c)
(1, 1400, 1868, 8)
labels = hp.im.instanseg_callable(
    img=image_array,
    device=device,
    instanseg_model=instanseg_fluorescence,
    pixel_size=pixel_size,
    output="all_outputs",
)
labels.shape  # ->z,y,x,c
(1, 1400, 1868, 2)
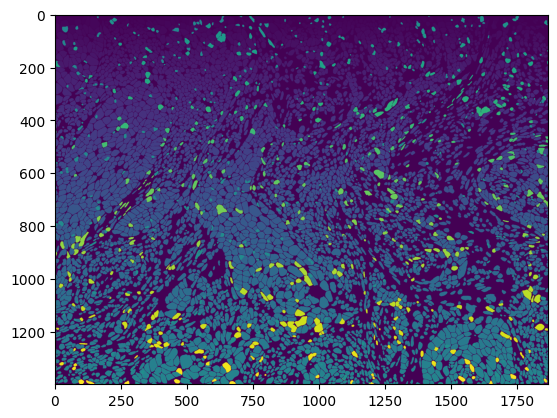
import matplotlib.pyplot as plt

plt.imshow(labels[0, ..., 1])  # plot whole cell masks
<matplotlib.image.AxesImage at 0x52916bf10>
2.2 Run instanseg using the Harpy segment function (recommended)#
This is the most convenient way to run the model. It takes care of loading the model, running the segmentation on large images and returning the results in a SpatialData object as a Labels element. The segmentation process will be distributed using Dask, ensuring the image is not fully loaded into memory and is instead processed in chunks.
We provide a path to the segmentation model (instanseg_model parameter), because a loaded InstanSeg model is of type torch.jit.RecursiveScriptModule, which is not serializable by Dask. Now each call to hp.im.instanseg_callable made by hp.im.segment (for each chunk), will load an Instanseg model, but because the model is small, this does not affect performance or increase memory usage.
# we first back the spatialdata object to a zarr store:

import tempfile
import uuid

from spatialdata import read_zarr

OUTPUT_DIR = tempfile.gettempdir()

zarr_path = os.path.join(OUTPUT_DIR, f"sdata_{uuid.uuid4()}.zarr")

sdata.write(zarr_path, overwrite=True)
sdata = read_zarr(sdata.path)
INFO     The Zarr backing store has been changed from None the new file path:
         /var/folders/q5/7yhs0l6d0x771g7qdbhvkvmr0000gp/T/sdata_3da72b78-a63d-41e8-8389-b9c7a4050b83.zarr
from dask.distributed import Client, LocalCluster

import harpy as hp

print(f"Using device: {device}.")

cluster = LocalCluster(
    n_workers=8
    if device == "cpu"
    else 1,  # if cuda device available, it is better to increase chunk size to maximal value that fits on the gpu, and set n_workers to 1.
    threads_per_worker=1,
    memory_limit="32GB",
)

client = Client(cluster)

print(client.dashboard_link)

sdata = hp.im.segment(
    sdata,
    image_name="image",
    output_labels_name=["labels_nuclei_harpy", "labels_cells_harpy"],
    output_shapes_name=["shapes_nuclei_harpy", "shapes_cells_harpy"],
    labels_name_align="labels_cells_harpy",
    chunks=1000,
    model=hp.im.instanseg_callable,
    # parameters passed to hp.im.instanseg_callable
    output="all_outputs",
    device=device,
    instanseg_model=path_model,  # load it in every worker, because torchscript model is not serializable
    overwrite=True,
)

client.close()
Using device: mps.
http://127.0.0.1:8787/status
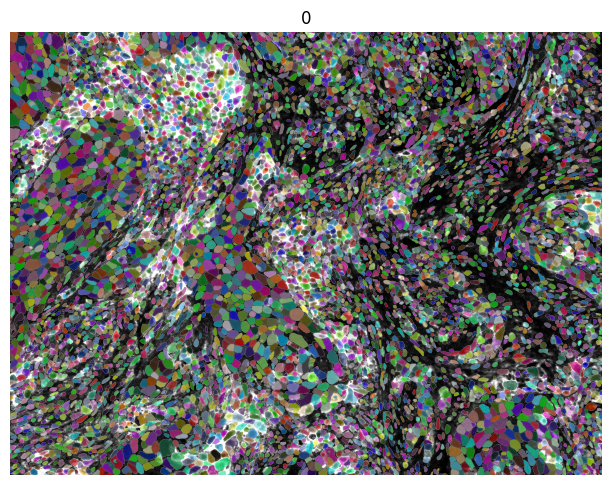
Visualize the segmentation mask using spatialdata-plot.
norm = Normalize(vmin=0, vmax=10, clip=True)

channel = 0

render_images_kwargs = {
    "cmap": "grey",
    "norm": norm,
}
render_labels_kwargs = {}
show_kwargs = {"title": str(channel), "colorbar": False, "dpi": 100, "figsize": (6, 6)}

ax = hp.pl.plot_sdata(
    sdata,
    image_name="image",
    render_images_kwargs=render_images_kwargs,
    labels_name="labels_cells_harpy",
    show_kwargs=show_kwargs,
    channel=[0],
)
ax.axis("off")
(0.0, 1868.0, 1400.0, 0.0)
# interactive viewing with napari-spatialdata

# from napari_spatialdata import Interactive

# Interactive( sdata )